
In this quick Photoshop tutorial I’ll teach you how to make right color correction on your photos.
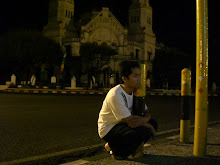
In this tutorial I will be using this stock photo of people and snake. Firstly, you should find a nice stock photo to work with. As I mentioned above, I used a nice photo people and snake. Ok open this file and correct the image levels with Image > Adjustments > Levels: 


Now we have a picture like this: 
After that correct brightness and contrast using Image > Adjustments > Curves with similar settings to these: 
So, the correction result must be next: 
Now apply brightness and color correction again thru all channels using Image > Adjustments > Curves with similar settings to below: 


Now your picture should look as mine: 
Ok, after that duplicate layer with Ctrl+J and apply Image > Adjustments > Hue/Saturation with the next presets to the upper layer: 
See the difference: 
Now get out the Eraser Tool and a soft round brush (Opacity: 50%, size of 45 pixels) and make a little clean work with this layer. Now we have a picture like this: 
To finish off the color correction apply Filter > Blur > Gaussian Blur: 
Looking better now, but not finished yet. 
Ok, the last thing… change layer mode to Multiply and set opacity to 70% up. 
That’s all for this tutorial! Sorry, but I hope you enjoyed the tutorial! Please feel free to apply this photo correction effect to your own pictures and have a fun!
Label: Photoshop Tutorial |


