Page 4 of 6 Eye Brightening Brightening the eyes will have a dramatic effect. It can be easily done by using a Brightness/Contrast adjustment layer. Choose Layer > New Adjustment Layer > Brightness/Contrast to add a new Brightness/Contrast adjustment layer. Rename this layer to Brighten Eyes. 
For now, set the brightness to 50 and contrast to 33. 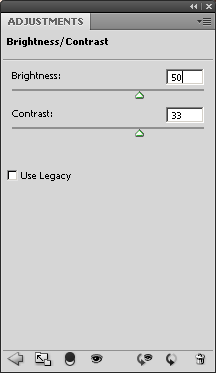
Select the layer mask and choose Image > Adjustments > Invert. This will invert the layer mask from white to black. 
Using the brush tool, paint the layer mask where the eyes are. You should see the eyes brighten as you paint. Then, go back into the Brightness/Contrast settings and readjust the settings. 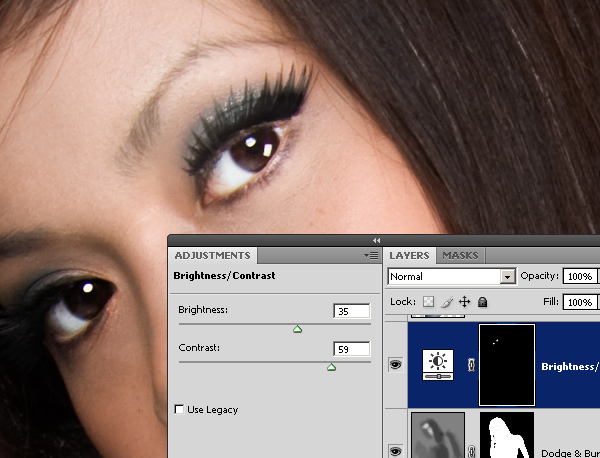
Page 5 of 6 Hair Shine Finally, we’ll add a shine to the hair. Start by using the quick selection or magic wand tool to create a selection of the hair around the area where you want the shine to appear. 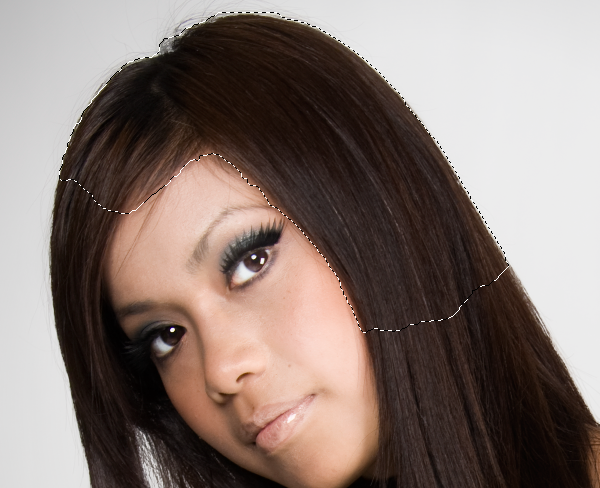
With the selection, choose Layer > New Fill Layer > Gradient. Position the layer above the Brighten Eye layer. Change the blending mode of the Hair Shine layer to overlay. You should have a layer like the image below. 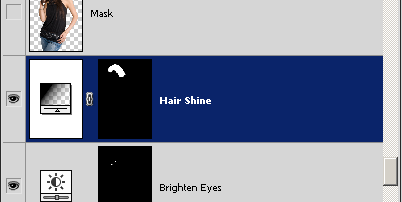
Go back into the Gradient Fill settings. Set the gradient to white to black and style to reflected. Checkmark the reverse option then click and drag on the document window and position the gradient where you want the hair shine to appear. Adjust the scale. 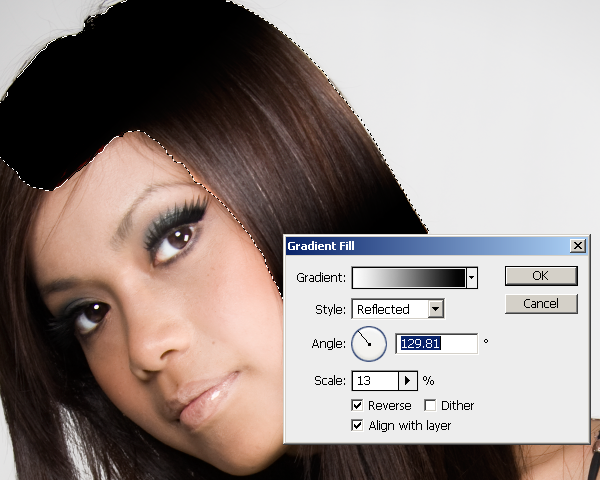
In the Gradient Fill window, click on the gradient to edit it. You should have a window like the image below. Create a gradient like the image below. To do this, click and drag the top left input slider to the middle of the gradient bar. Do the same with the bottom left input slider. Then, click on the individual input sliders and adjust the settings as shown in the image below.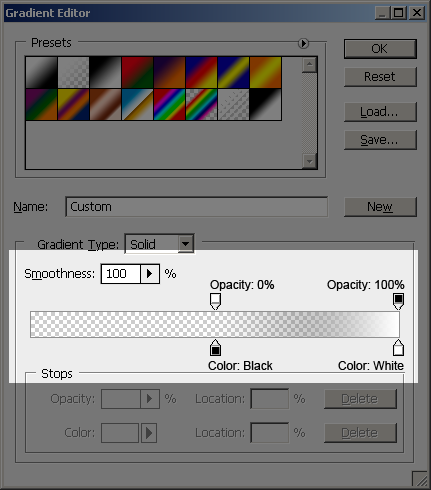 We now have a hair shine but it does not match the color of the hair. We’ll add back a little of the hair color to the shine. to the shine. - Click on the bottom left input slider.
- Click on the color setting and a color picker window will appear.
- Click on the hair to capture the color of the hair.
- Move the color picker towards the top left until the hair color looks natural.
- Click OK three times to exit out of the gradient settings.
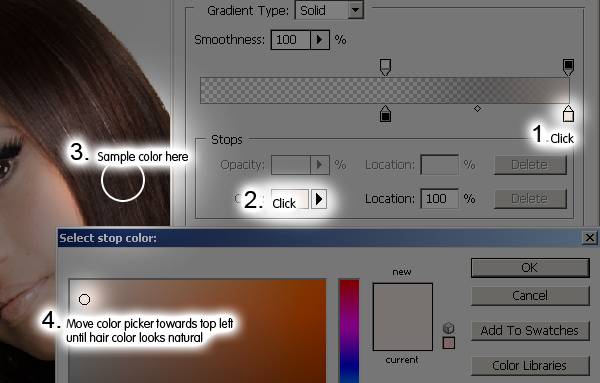
We have added the hair shine but if you look closely, you can see some artifacts. 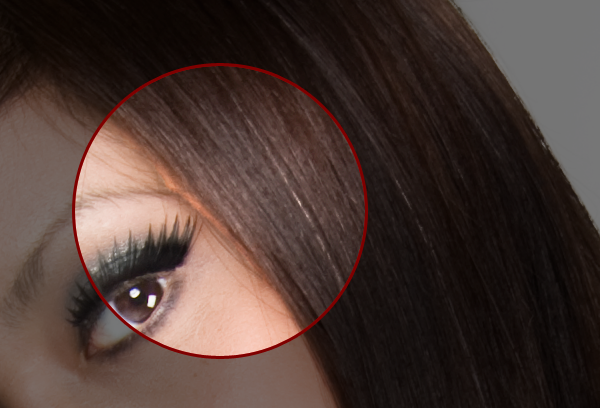
We can easily fix this by blurring the layer mask. Select the Hair Shine layer mask then choose Filter > Blur > Gaussian Blur. Adjust the settings until the unclean edge fades. 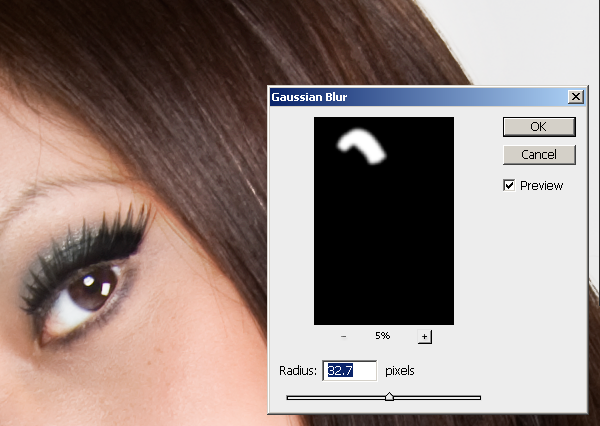
If the hair shine is overlapping the skin, use the Minimum filter to hide it. Choose Filter > Other > Minimum and adjust the slider. 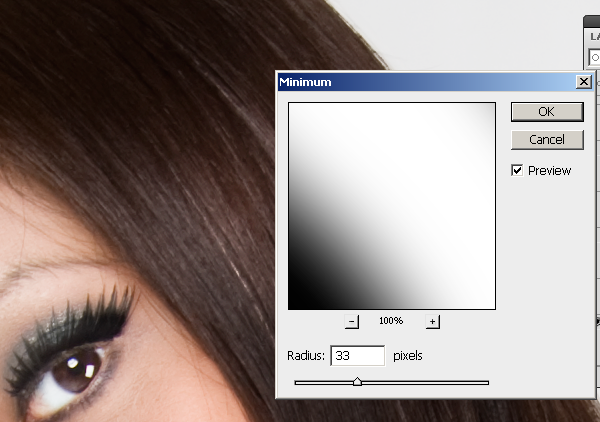
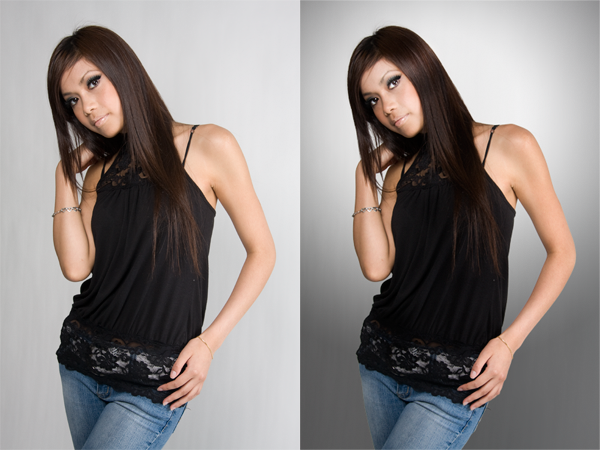
Here is the before and after effect of adding hair shine. You can add emphasis to the eyes by aligning the hair shine with the eyes. 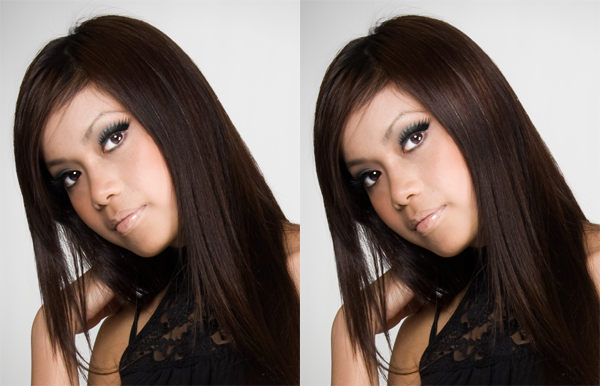
Final Results 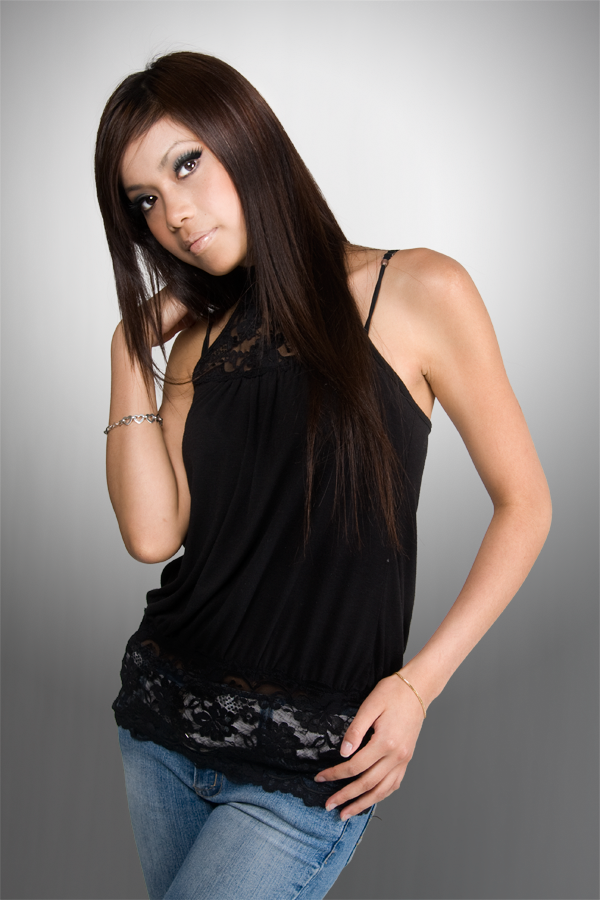
Label: Photoshop Tutorial |

