Page 1 of 6  This Photoshop tutorial is written for experienced Photoshop users and will show you unique techniques for retouching photos. You’ll learn how to enhance backgrounds, dodge and burn, brighten eyes, and add hair shine while keeping a low count of layers. The techniques you learn from this tutorial can be used for other portrait photos. This Photoshop tutorial is written for experienced Photoshop users and will show you unique techniques for retouching photos. You’ll learn how to enhance backgrounds, dodge and burn, brighten eyes, and add hair shine while keeping a low count of layers. The techniques you learn from this tutorial can be used for other portrait photos.
Before and After 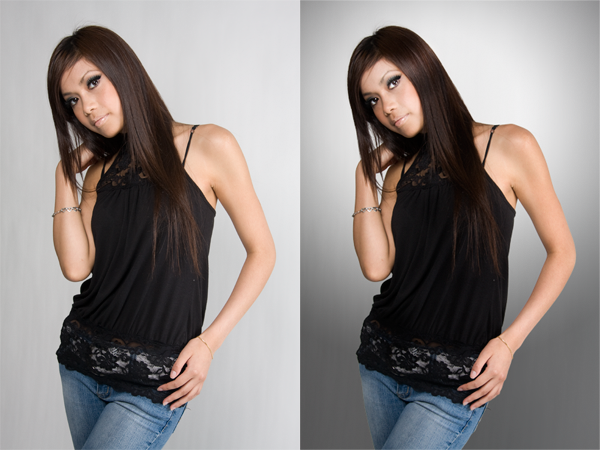
Retouching a Studio Portrait Photoshop Tutorial Retouching the background Here is the original image. As a photo it looks fine but it looks flat and boring. This Photoshop tutorial will show you techniques used to make the photo have a stronger impact. You can follow this tutorial with one of your own image or you can use the image below: 
Creating the mask The first step is to isolate the model from the background. I used the extract and color range tool to create this. First I used the extract tool (Filter > Extract) but it didn’t work very well for the hair. 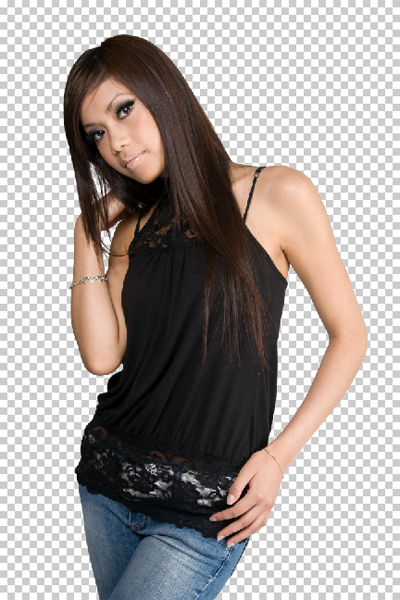
I then use the color range tool (Select > Color Range) to select the areas that were hard to extract using the extract tool. 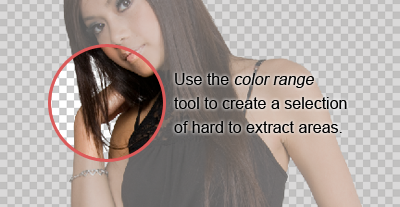
Now we have a mask in it’s own layer. 
Page 2 of 6 Adding a gradient to the background With the mask created, I can add a gradient to the background. Adding a gradient to the background is a simple and effective way to enhance a boring background. Here is a preview of what the layers will look like in the end. 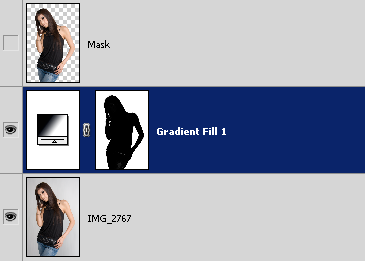
To create a gradient background, we’ll be adding a gradient fill layer using the mask that we just created. To do that, hold down the Ctrl key and click on the layer thumbnail of the layer “Mask”. It will load the selection of the layer. Choose Select > Inverse to inverse the selection. Then, choose Layer > New Fill Layer > Gradient. 
In the Gradient Fill tool, move the center of the gradient behind the head. You can do this by clicking and dragging on the document window. 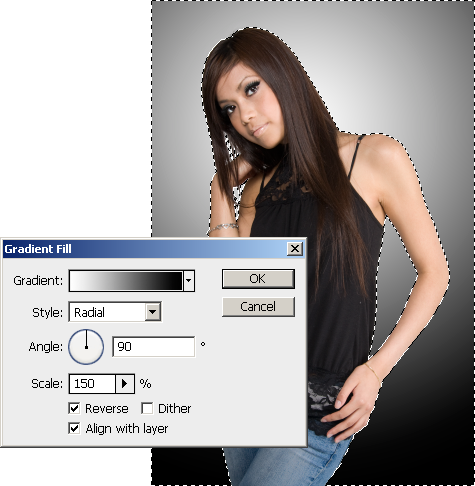
To increase contrast, you can change the gradient so that it is like the image below. 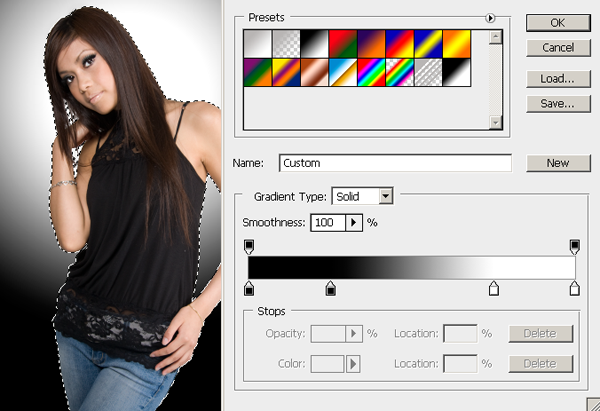
Finally, adjust the opacity of the Gradient Fill layer. I set mine to 50% opacity. 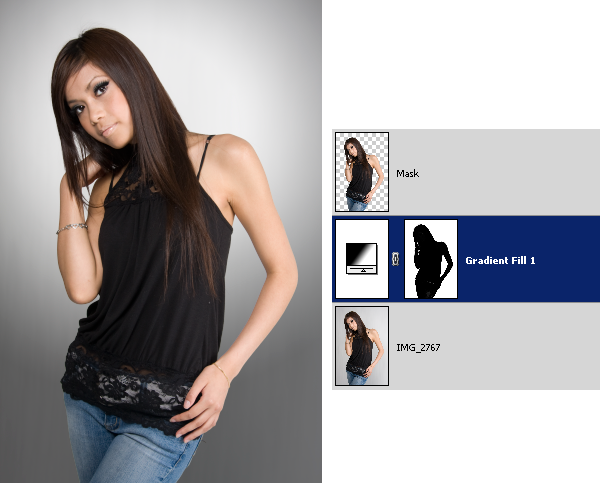
Page 3 of 6 Tone Begin by creating a new layer for dodging and burning. Position the layer above the gradient fill adjustment layer. Then, change the blending mode to soft light. 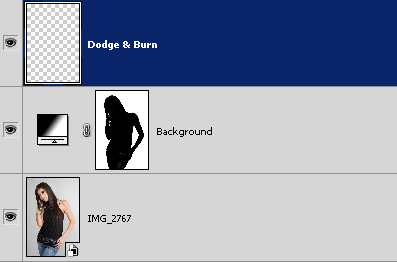
Choose Edit > Fill and use the settings below. 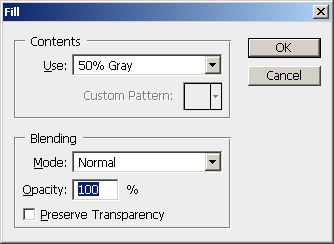 The layer should now be filled with a 50% gray. 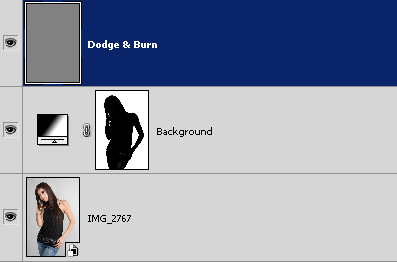
Add a layer mask using the shape from the Mask layer. Hold down the Ctrl key and click on the layer thumbnail of the Mask layer . Then, click on the  in the layers palette to add a layer mask. in the layers palette to add a layer mask. 
Click back on the 50% gray layer thumbnail and use the dodge and burn tools. For the image below, I used the burn tool to darken the models right side of the face, hair, top, and her arms. Then, I use the dodge tool to brighten the other side of the models face. 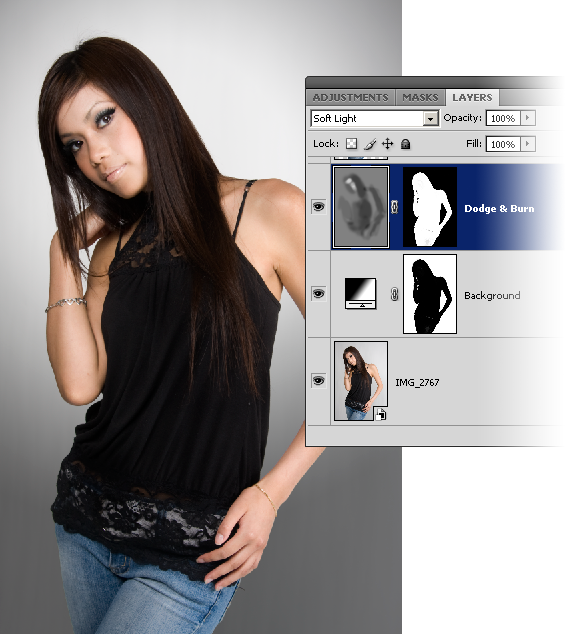
Here is a before and after effect of the dodging and burning. 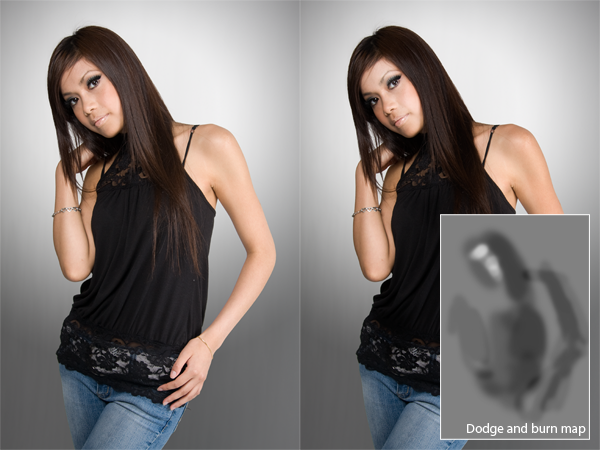 Label: Photoshop Tutorial |

