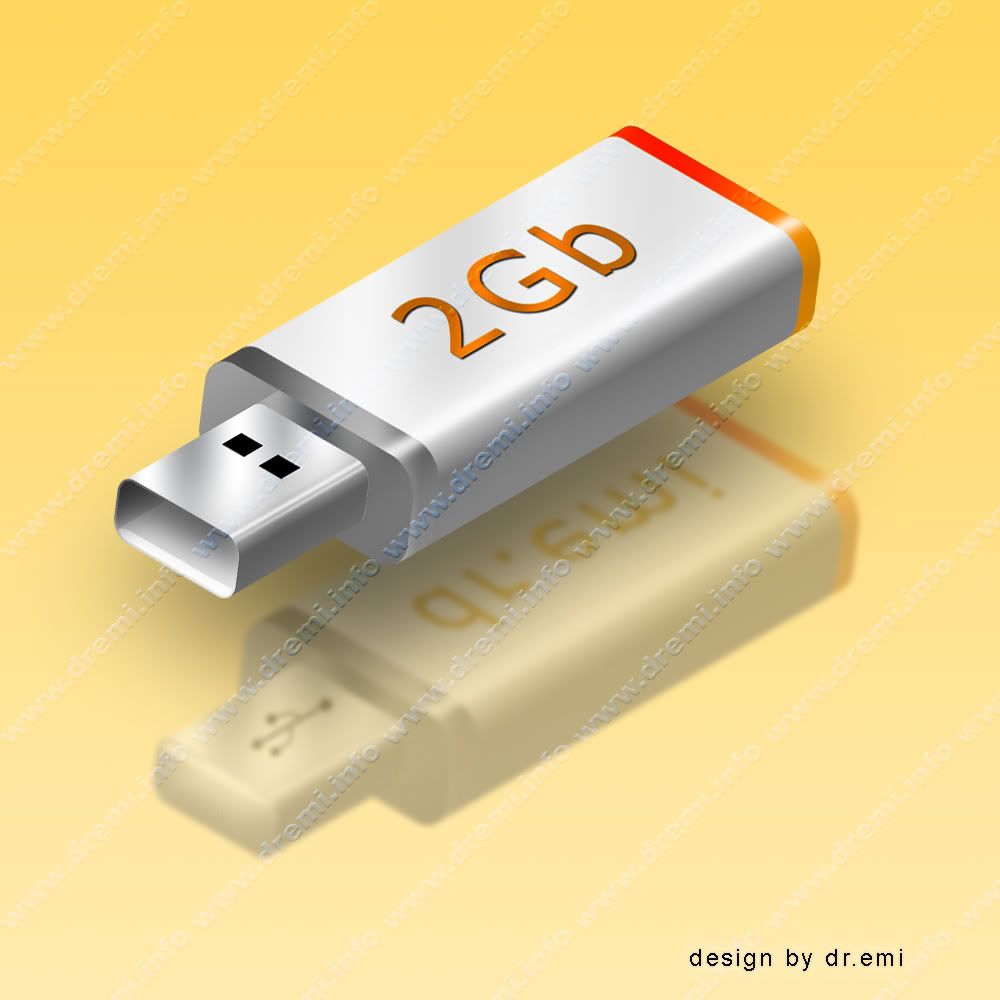
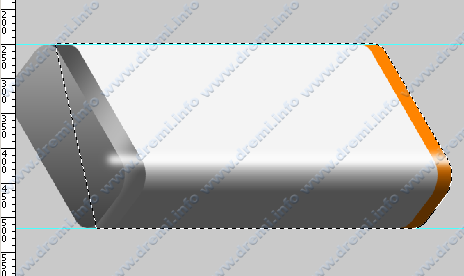
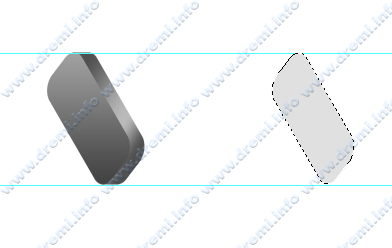
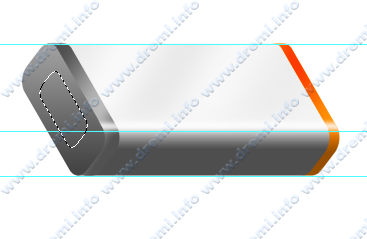
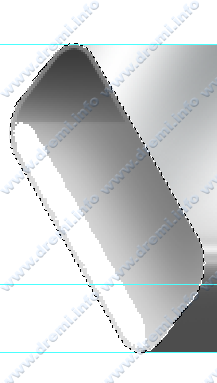
Kali ini gw share hasil belajar gw, tema tutorial tetep experimental dan belum pernah gw bikin sebelumna Kalo sebelumna gw bikin flash disk dengan 2D, kali ini gw bikin dengan 3D, tentuna tidak semudah membuat objek 3D di Maya atow 3D Max. Preview hasil akhir na, bwat penyemangat kalian :)) 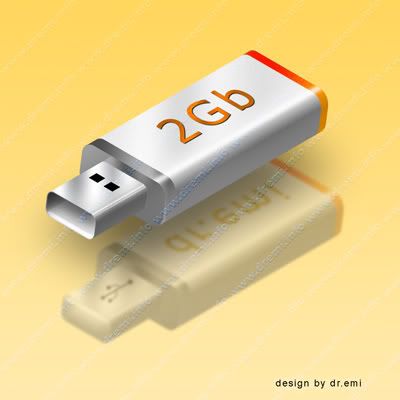
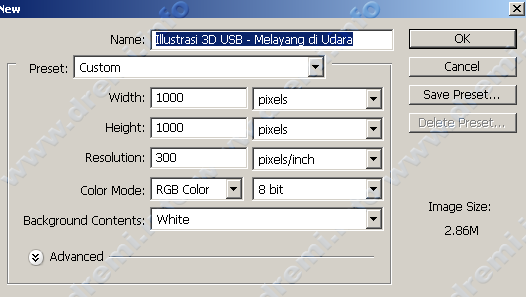
tertarik kan bwat nyoba ??? Seperti biasa puter musik lu sekeras keras nya, hilangkan stress !! hilangkan beban pikiran !!! hilangkan semua yang mbikin ruwet di otak lu pada !!! Buka Mesin Photoshop Lu... !!! bwat dokumen baru ukuran 1000 x 1000 px, background putih dan DPI na 300 pixel/inc 
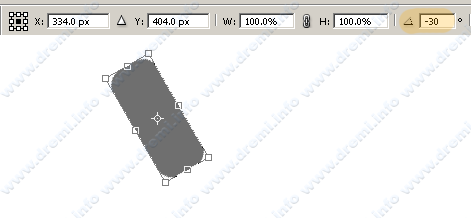
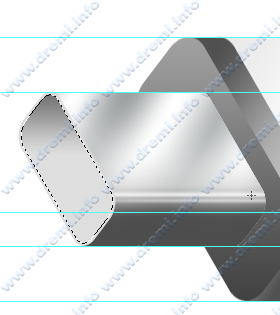
huoke, siapkan marquee tool na, bikin bidang seleksi, dengan Fixed size : 100 x 240 px, dan gunakan mistar guide bwat mbikin batasan setelah seleksi terbentuk 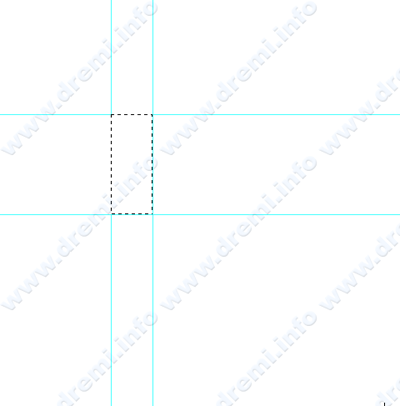
Sebelumna hilangin seleksi na dolo dengan [CTRL+D], bikin layer baru kasi nama layer "front b" ambil shape tool, dengan mode: Fill Path. 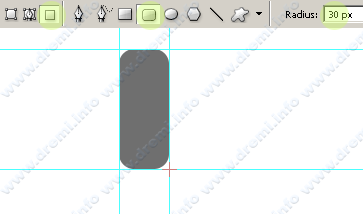
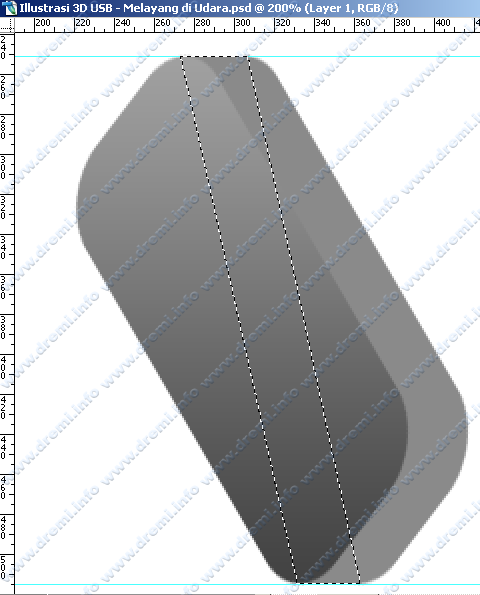
Pencet [CTRL+T] dan Trasnform Rotate 30 derajat ke kiri. Sikat !!!! Tombol [ENTER] na wkwkwkwwkwk :)) 
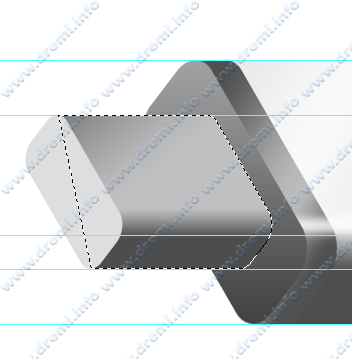
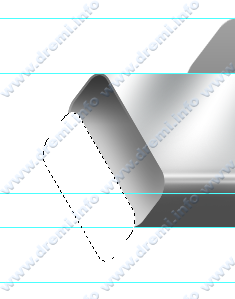
kembali [CTRL+T] kali ini pilih gunakan Skew -30 derajat, kembali HAJAR !!! tombol ENTER na, hihi :)) 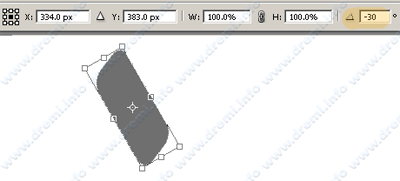
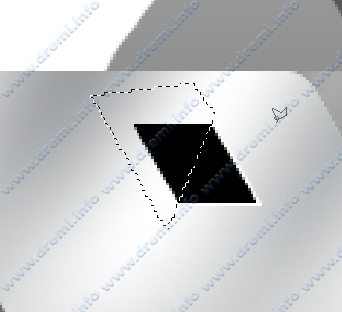
Lu boleh trasform Rotate dan Skew sekaligus, cuman hasilna ujung shape jadi rada pecah Sekarang duplikat layer front b atow [CTRL+J], geser sekitar 30 pixel ke kanan (atow satu kali [SHIFT+Panah ke kanan] ) 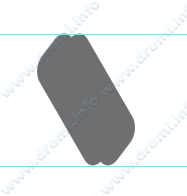
Ubah nama layer hasil duplikat menjadi front a Kasi gradasi bwat layer front a, dengan warna gradasi dari #3a3a3a ke #a8a8a8 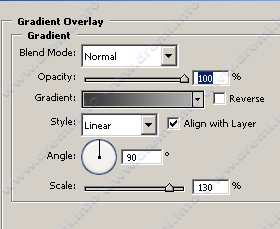
perhatikan perpotongan kedua ujung atas dan bawah, ambil tool poligon lasso, bwat menutupi bidang yang masih terbuka, dan kasi warna sama, pada layer front b 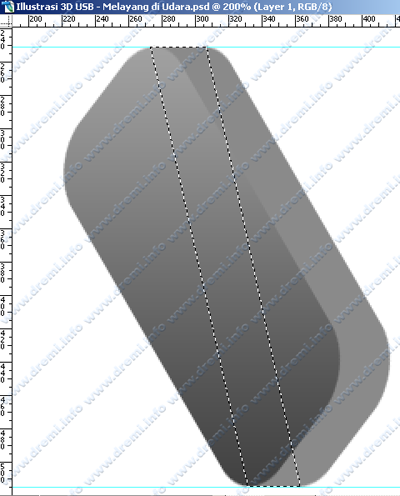
kasi gradasi juga bwat layer front b gunakan gradasi sedikit metal untuk layer front a 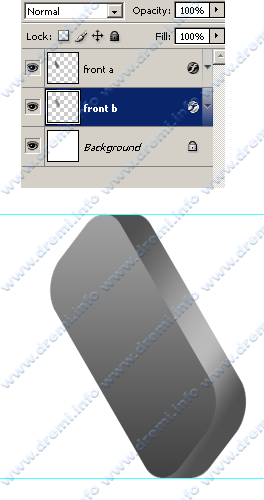
pencet [CTRL+Click] pada layer front a, geser seleksi na ke kanan sesuai ukuran flash disk yg ada di imajinasi lu, bikin layer baru namanya "back-side". Tros kasi warna grey agak muda 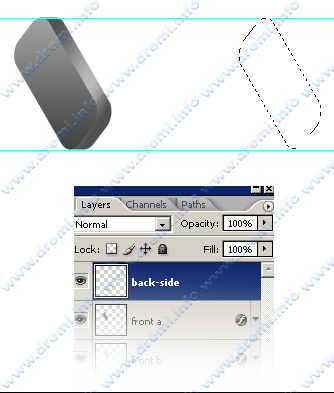
haha, masih lom jadi juga, ya iyaaalaaahhh kan lom apa apa, masih panjang mbro... !!! bikin layer baru, dibawak front b, kasi nama layer body. 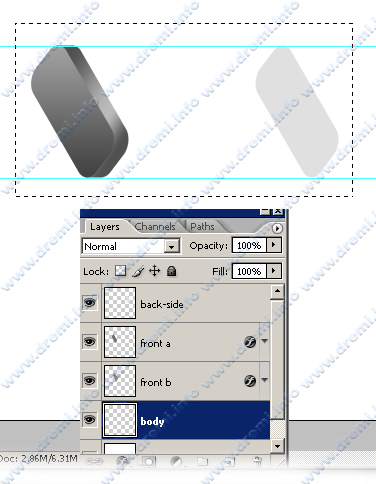
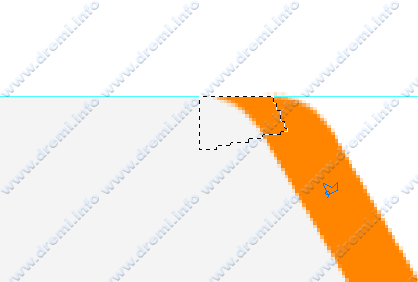
ambil poligon lasso tool, bikin bidang seleksi mengikuti petunjuk berwarna orange. Tros [CTRL+Click+SHIFT] pada layer back-side, nah jadi seleksi keseluruhan body bakalan kaya gini 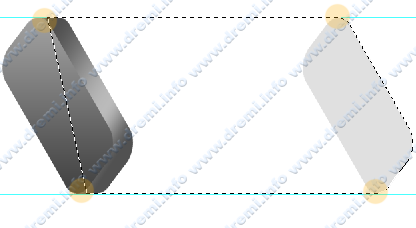
kasi warna sama grey juga 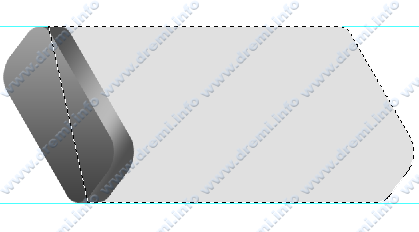
untuk sementara hidden aja layer back-side na (hilangkan ikon mata pada layer back-side). selanjot na, kasi gradasi ke gini bwat body na: 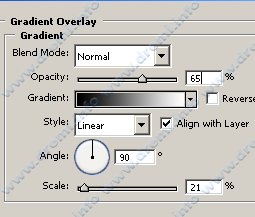
dengan menggunakan move tool, klik dan drag arah gradasi na biar sesua intensitas terang gelapna, catatan: teknik klik dan drag move tool ini digunakan saat jendela layer style aktif 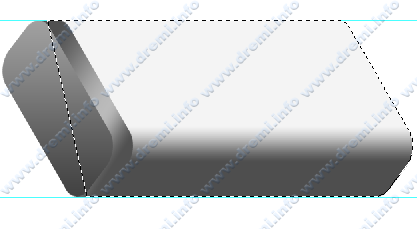
lanjot, [CTRL+Click] pada layer back-side yg lu hidden tadi, tros geser ke kanan 30 px, bwat layer baru dengan nama back-stroke, tros kasi warna orange 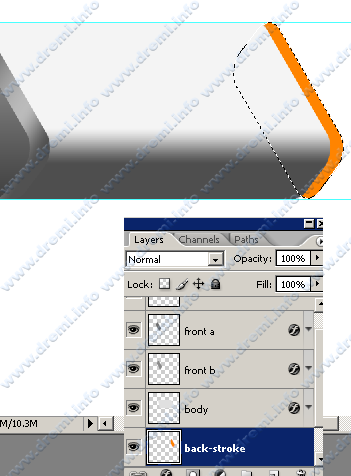
dengan cara sebelumna, edit bagian ujung yang masih terbuka dengan poligon lasso tool, tentuna dengan warna yg sama 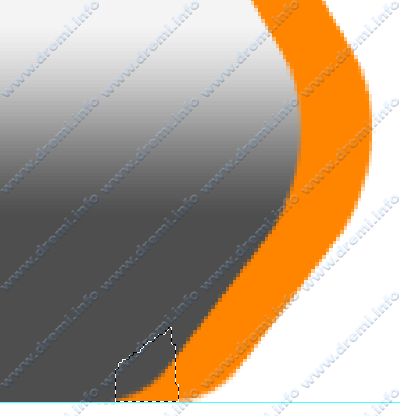
kasi style gradient overlay juga bwat layer back-stroke 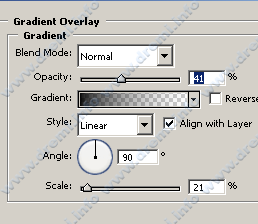
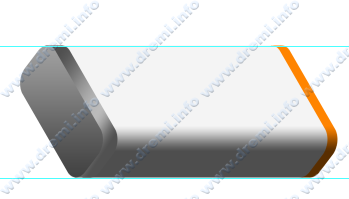
sekarang kita bikin highlight na, bwat layer baru namana highlight, pake line tool, dengan w: 8 px dan warna putih 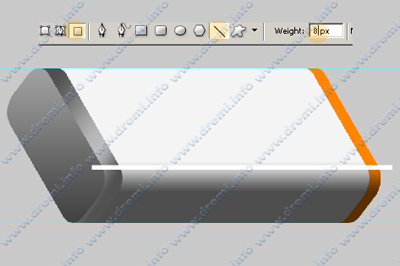
kasi Filter > Blur > Gaussian Blur, dengan radius: 4.5 px 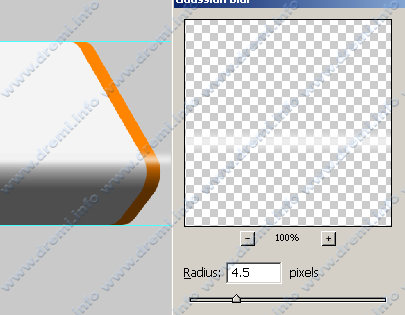
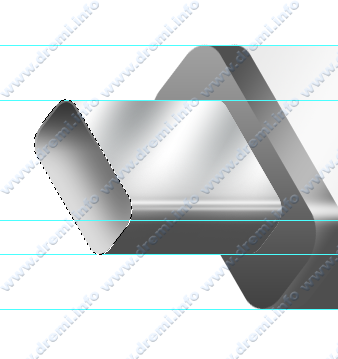
kite bakalan ngilangin bagian nyang lebihna, [CTRL+Click] pada layer body, tros [CTRL+SHIFT+I] atow Select > Invers, pencet [DELETE] bwat ngapus bagian lebih na 
[CTRL+Click] juga pada front b, dan HAJAR !!! tombol [DELETE] na 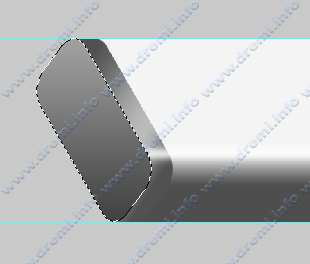
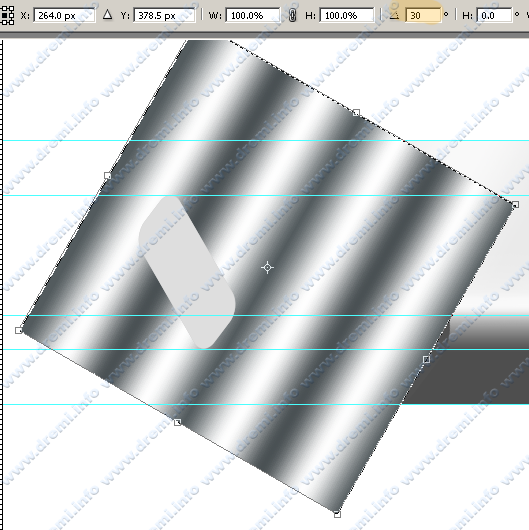
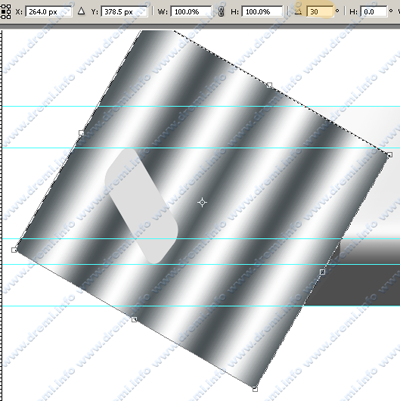
Bikin layer baru di atas layer body, dengan nama layer "reflection" ambil gradient tool, reset gradasina make pencet tombol [D]. tarik gradasi bebas dari kiri ke kanan pada seluruh area canvas 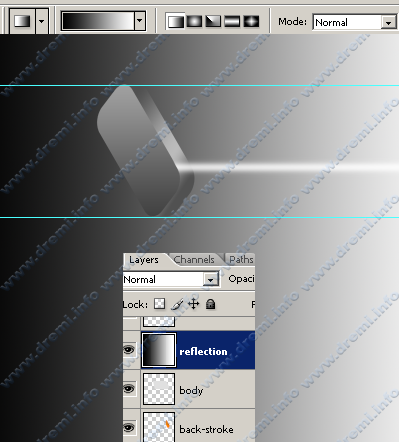
Pilih menu Images > Adjustments > Curves, kasi setting curve kaya gini: 
Trasform Rotate layer reflection 30 derajat ke kanan 
[CTRL+Click+SHIFT] pada layer front a, back-side, dan body. tros [CTRL+SHIFT+I] dan HAJAR [DELETE] na 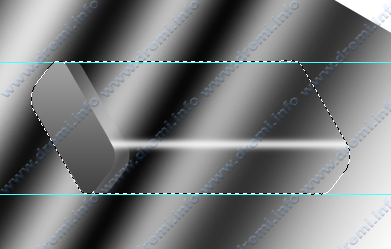
ni hasil na 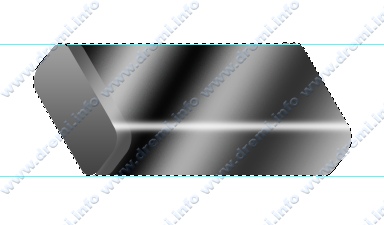
Ubah blending mode na menjadi overlay dan opacity tetep 100 % 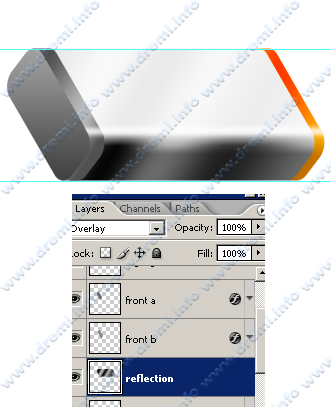
hapu dengan eraser tool, pada bagian samping yang keliatan na terlalu gelap akibat penerapan blending mode overlay 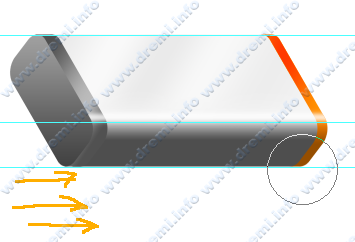
bwat layer baru namana plug, di atas layer highlight, dan [CTRL+Click] layer front ana, tros Trasnform Selection (Select > Transform Selection) menjadi lebih keci ldari layer front a 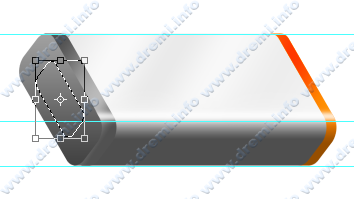
kasi warna grey muda 
duplikat layer na dan geser ke kiri, ni bwat objek plug USB na 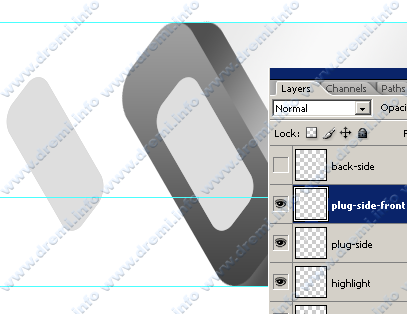
ulangi langkah sebelumna bwat mbikin body na 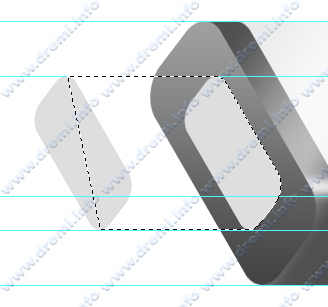
kasi gradasi transparent dari kiri atas ke kanan bwah 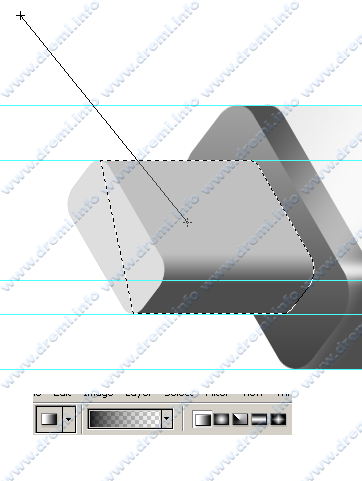
untuk refleksi na pake cara sebelumna juga dengan gradasi metal, dari kiri kanan, dan transform rotate 30 derajat ke kanan 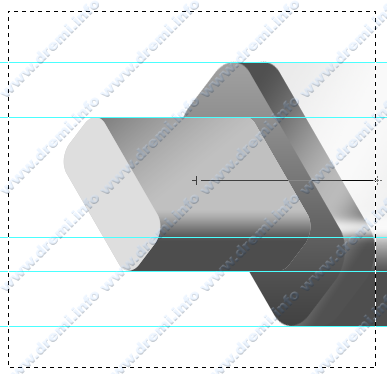
seperti biasa, hilangkan bagian lebih na dengan select invers dan delete, dan ubah blending mode na menjadi screen, opacity: 80 % hapus bagian yang terlalu gelap 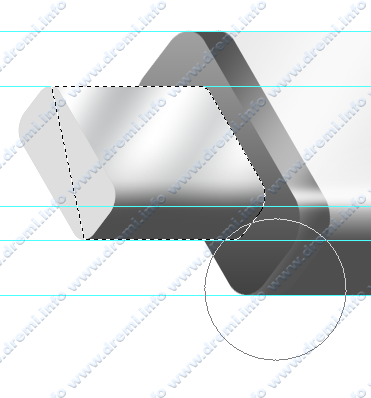
bwat hightlight na juga dengan ukuran 2 pixel 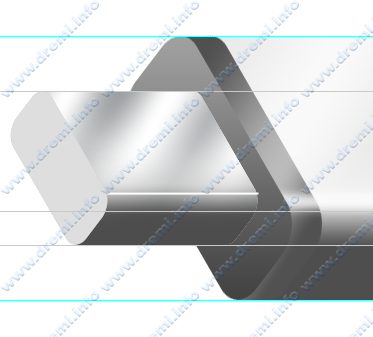
kasi blur juga, carana sama persis dengan mbikin highlight sebelumna 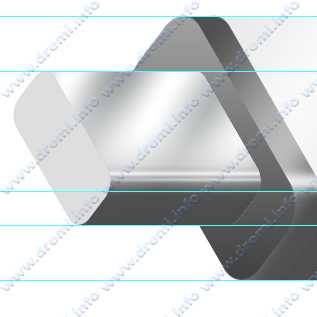
slanjotna bikin layer baru lagi, namana kali ini terserah lu dah kasi gradasi trasparent hitem 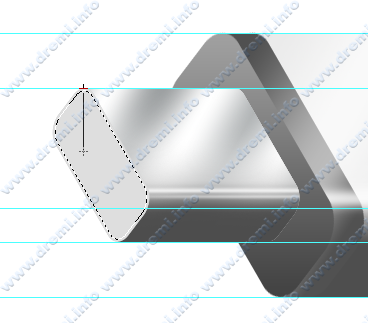
sekarang bikin shadow item untuk bagian atas dalem na: pake poligon lasso tool 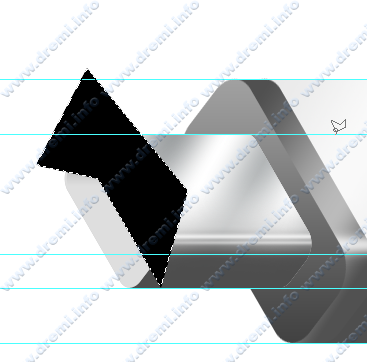
delete bagian luar na make select invers kaya tadi, dan kasiin blur, sesuaikan dengan selera lu 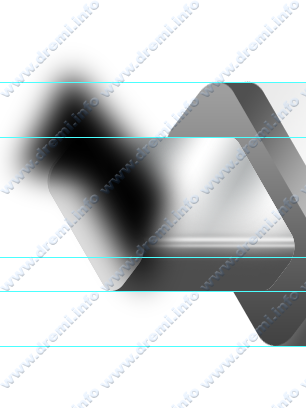
bikin lempengan putih na, ni bwat element PCB pada USB na 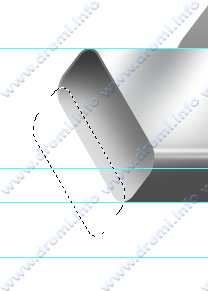
delete bagian luar na 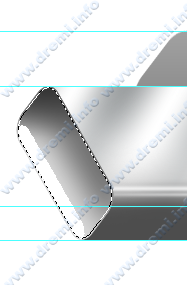
untuk body dalem na pake poligon lasso tool juga, kasi warna grey agak terang, delete lebihna 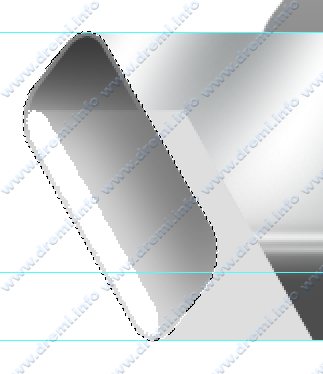
preview hasil sementara 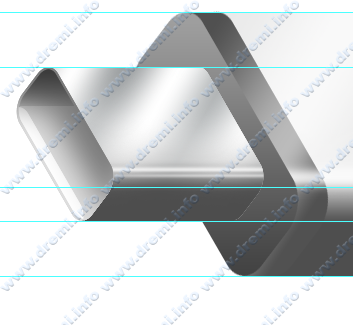
jimane pegel kan pinggang lu, hihi, gw aja pegel nih tengkuk na... lanjot yak!! sempurnakan bagian ujung na, make poligon lasso tool 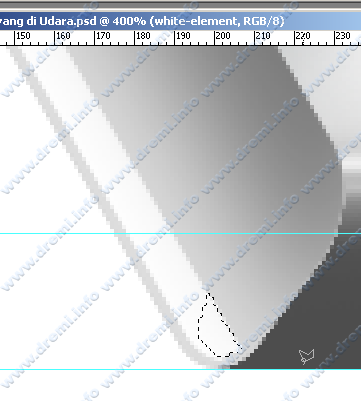
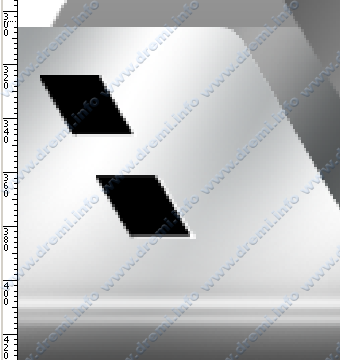
Bikin kotak hitam bwat lubang plug USB na, bisa make marquee tool, kasi warna item, nama layer na "slot" 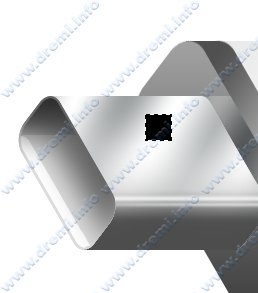
trasnform skew 30 derajat 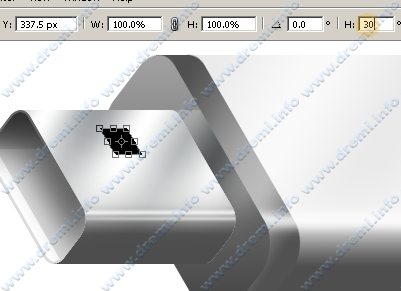
duplikat layer slot, pencet [CTRL+U] ubah warna na menjadi putih, dan geser 1px ke kanan, hapus setengah bagian dari slot duplikat yg berwarna putih 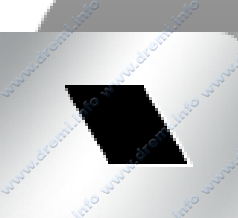
merge kedua layer slot, dan duplikat hasil merge na, sejajarkan biar lurus 
kasi text bwat label USB na 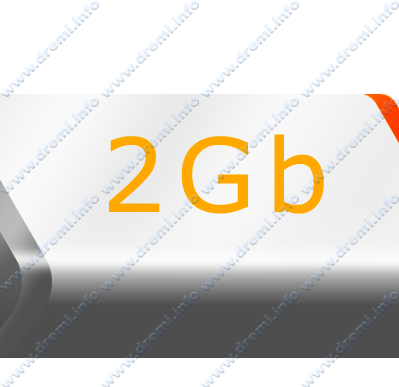
trasform skew juga 30 derajat, dan kasi drop shadow dikit 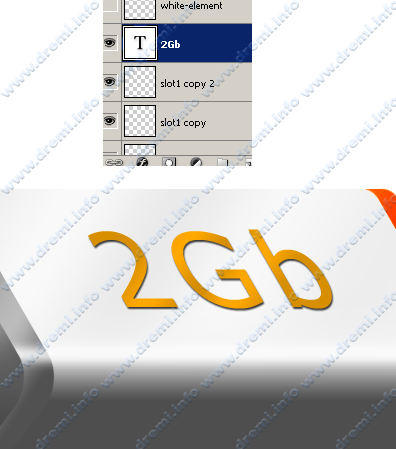
woke, group semua layer sebelumna ke dalam satu layer group duplikat group na, dan geser ke bawah ... ni bwat refleksi 3D na, kasi text juga yah 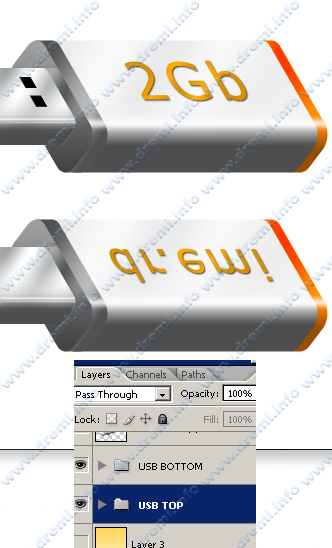
tros download USB Sign na disini dlu, untuk objek USB bayangan di bawahna 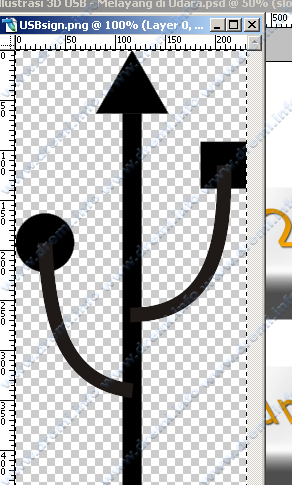
Konsentrasi pada USB BOTTOM (refleksi 3D na) kopi paste gambar USB sign ke dalam area kanvas USB BOTTOM, dan perkecil, sesuaikan arahna 
Vlip Vertical USB Sign na 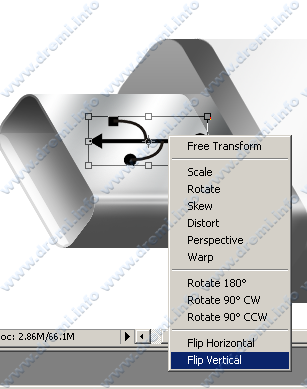
Blok semua layer ujung plug, dan Trasform 180 derajat 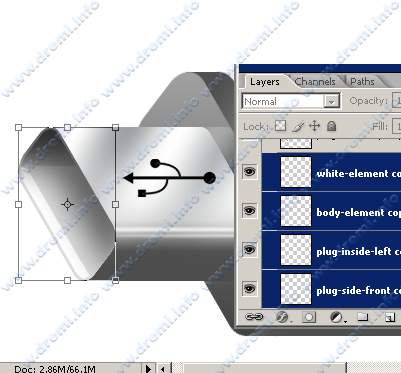
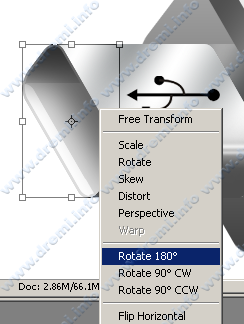
nah lu atur dah biar objek na ga berseberangan edit bagian ujung na, tambal make warna yg sama 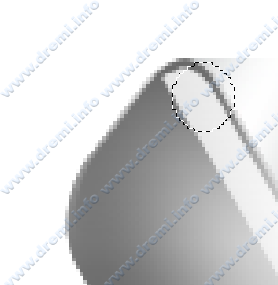
tht's good brother 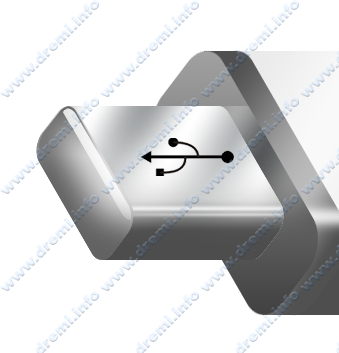
woke, saat na me merge masing masing layer group, USB TOP dan BOTTOM, tapi saran gw asli na jangan di merge, mending lu duplikat ulang keduana, ni bwat master desgin USB na 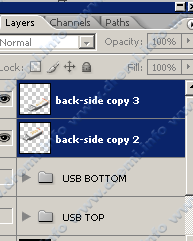
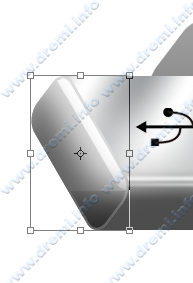
dan trasform hasil merge na, bersamaan, rotate na -30 derapat (ke kiri) 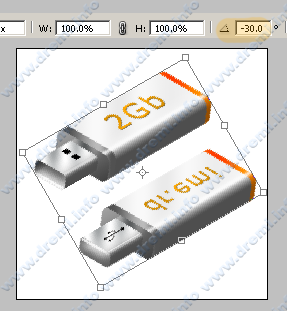
sejajarkan pososi USB bwah na 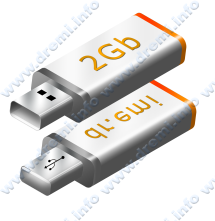
untuk USB refleksi 3D yg bawah, gw kasi blur, radius: 3px 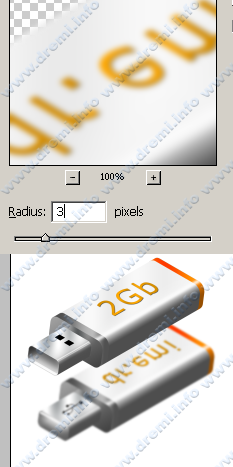
dan kurangi opacityna menjadi 40 % ambil poligon lasso tool, bwat bikin bayangan gelap, diantar kedua USB 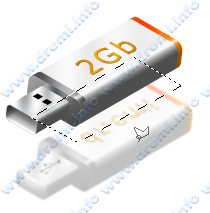
kasi warna gelap, dan kasiin juga blur 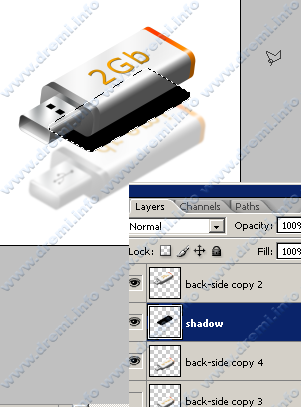

kurangi opacity shadow na menjadi 30 % 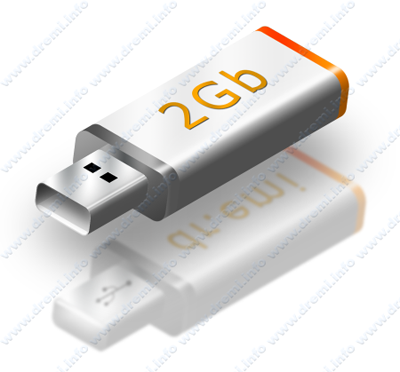
terakhir kasi tau tmen2 lu, bwat gabugn disini, biar bisa beljar bareng hihi,... :)) alna akhir2 ini gw sedih, kanapa tmen2 yg pada baca tuts gw cuma sekedar mampir dan liat dowank, komen kek apa kek, jangan diem ajah hoke brother !!!!
Label: Photoshop Tutorial |